This week is all about multi-app kiosk mode on Windows 11. That on itself is not something really new and to get started with that, have a look at this post around configuring multi-app kiosk mode on Windows 11. The documentation, however, is getting better and better, by describing more and more capabilities for multi-app kiosk mode on Windows 11. One of the challenges used to be the profile assignment of the multi-app kiosk mode configuration. Especially when looking at an autologon scenario. There are now configurations available to address basically all of the different scenarios that could be required. From autologon, to global assignment, to individual assignments, to group assignments. And from local accounts to Entra accounts. This post will provide a closer look at the profile assignment of multi-app kiosk mode, including examples and user experience.
Introducing the available profile assignment options
When creating multi-app kiosk mode on Windows 11, that all starts with an Assigned Access profile. Assigned Access is a feature of Windows that can be used to configure a device as a kiosk or with a restricted user experience. Within that restricted user experience, users can only execute a defined list of applications, with a specially configured Start menu and Taskbar. By default, different policy settings and AppLocker rules are enforced to create a locked down experience. An Assigned Access profile is based on an XML-file. That requires some configurations around which apps should be available and pinned. On top of that, that configuration can be assigned to the required user or group that should receive the multi-app kiosk mode configuration. The table below provides an overview of the different account types that can be used for the profile assignment.
| Type | Usage | Description |
|---|---|---|
| AutoLogon account | | This tag makes sure that Assigned Access creates and manages a user account to automatically sign in after a device restarts. The account is a local standard user. |
| Global profile | | This tag makes sure that the Assigned Access profile that is applied to every non-admin account that signs in. |
| User account | <Account>user</Account> | This tag makes sure that Assigned Access uses a Local account. The account can be entered as devicename\user, .\user, or user. |
<Account>corp\user</Account> | This tag makes sure that Assigned Access uses a Domain account. The account can be entered as domain\samAccountName. | |
<Account>AzureAD\user@pvdw.onmicrosoft.com</Account> | This tag makes sure that Assigned Access uses an Entra account. The account can be entered as AzureAD\{UPN}. | |
| Group account | <UserGroup Type="LocalGroup" Name="groupname" /> | This tag makes sure that Assigned Access uses a local group. The group can be entered as LocalGroup. |
<UserGroup Type="ActiveDirectoryGroup" Name="corp\groupname" /> | This tag makes sure that Assigned Access uses an Active Directory group. Both security and distribution groups are supported. The group can be entered as ActiveDirectoryGroup. | |
<UserGroup Type="AzureActiveDirectoryGroup" Name="Group_GUID" /> | This tag makes sure that Assigned Access uses an Entre group. This group can be added as AzureActiveDirectoryGroup, by using the object ID of the Entra group.. |
Note: The <AutoLogonAccount> tag and the <GlobalProfile> tag both rely on specific versions of the XML schema for Assigned Access. Make sure to include the namespace of the related version of the XML schema.
Configuring the profile assignment
When looking at configuring the profile assignment, it is basically about assigning the profile – that is created in the Assigned Access configuration – to a specific user or user group. That would make sure that the specified user will automatically get the multi-app kiosk mode configuration applied. Below is a snippet that provides an example for an autologon user. That basically contains two configurations. The first being the display name of the user account and the second being the GUID of the profile.
<Configs>
  <Config>
    <AutoLogonAccount rs5:DisplayName="Kiosk user"/>
    <DefaultProfile Id="{GUID}"/>
  </Config>
</Configs>Note: This snippet can be used in combination with the configuration as shown in this post describing the basics for setting up multi-app kiosk mode configuration on Windows 11. The only different would be the <config> section.
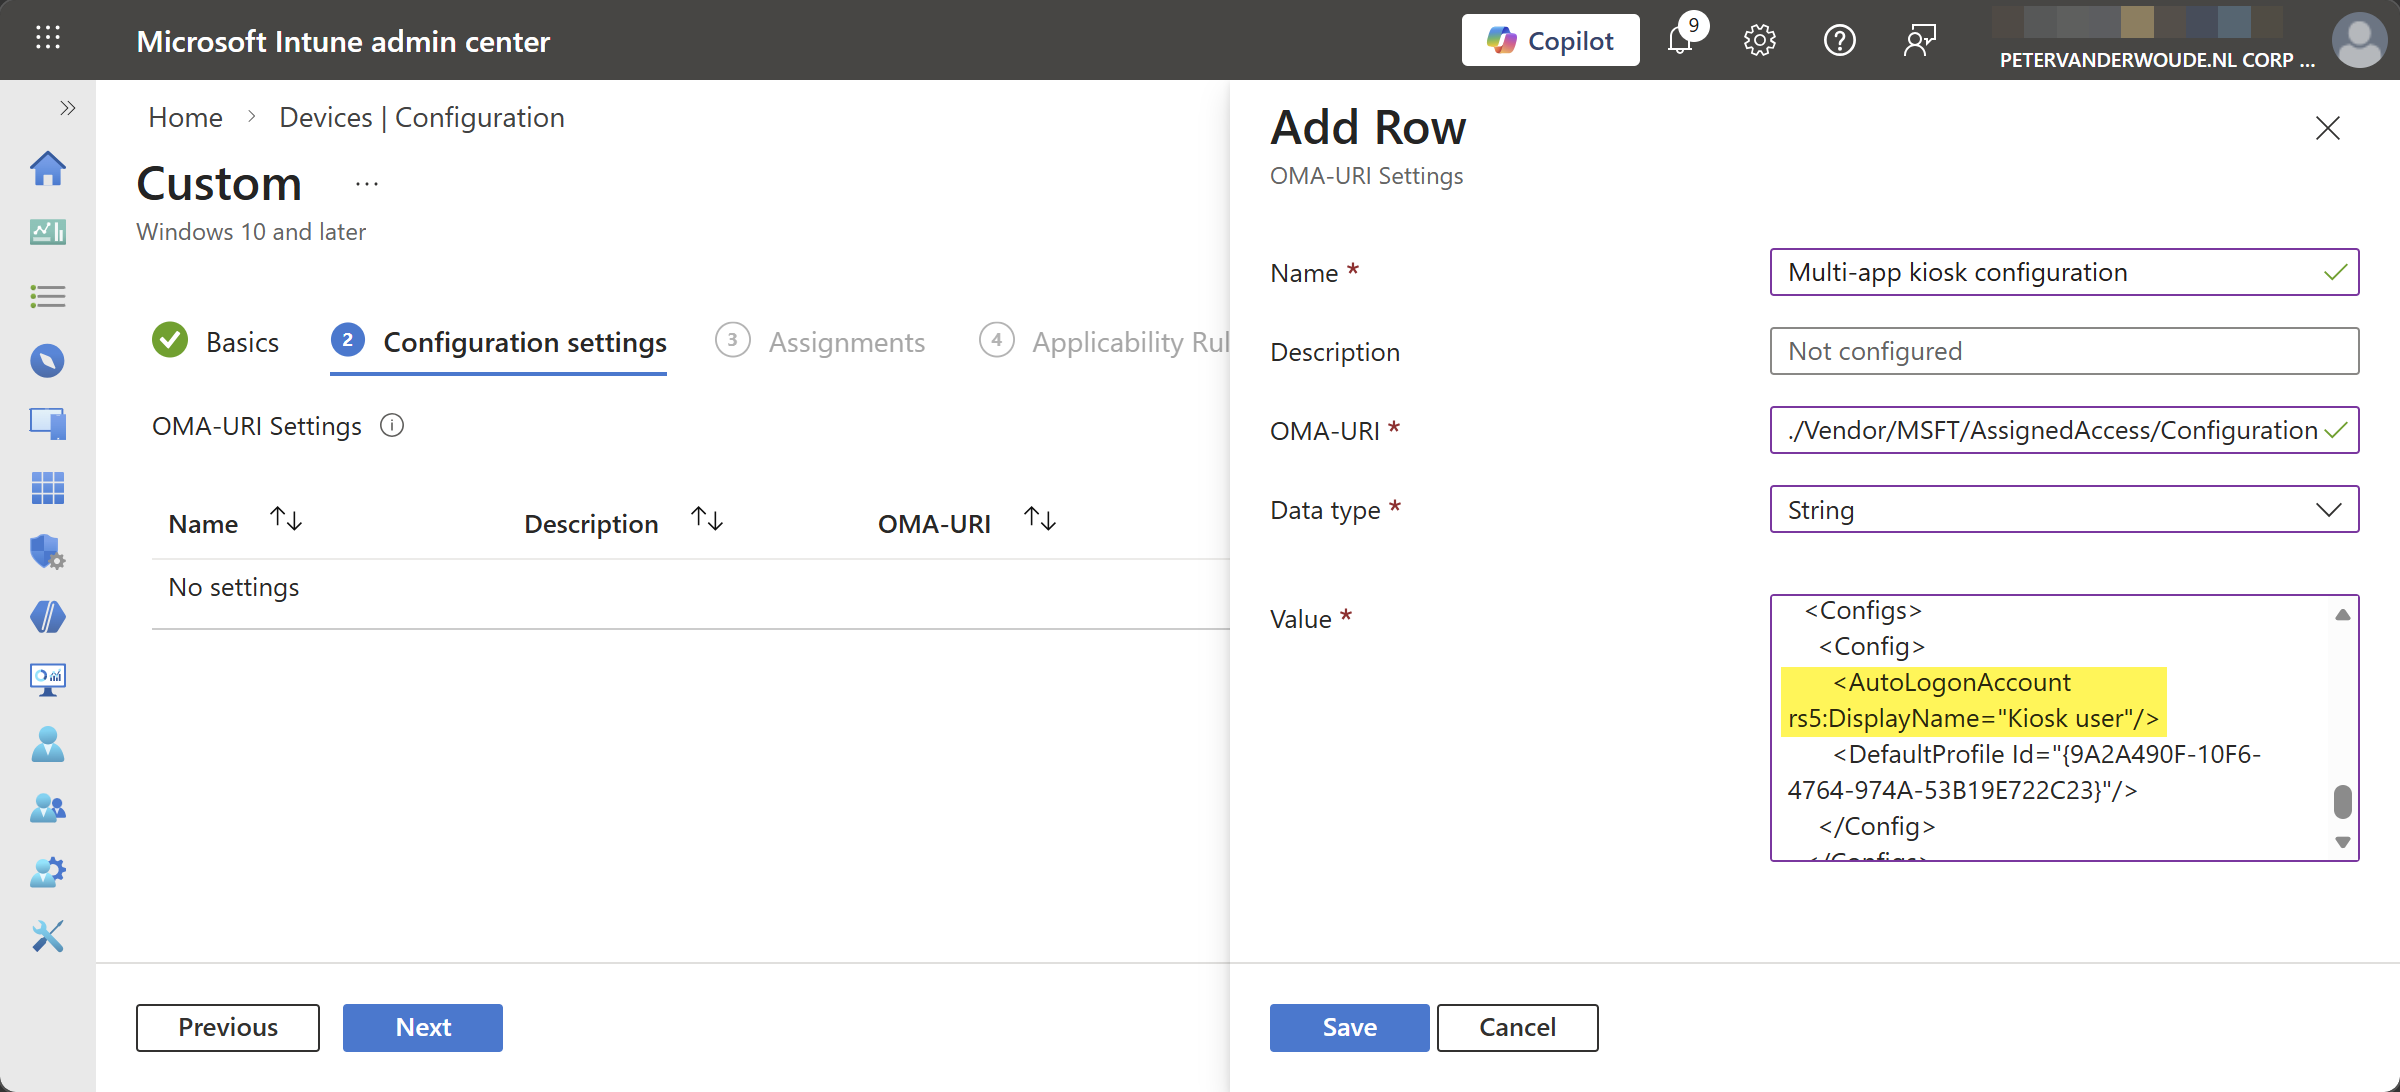
For applying the multi-app kiosk mode configuration, all roads point to the AssignedAccess CSP. That CSP can be used to configure a Windows device to run in multi-app kiosk mode. Once the CSP has been executed, the next user login that is assigned with the multi-app kiosk mode puts the device into the specified kiosk mode. Within Microsoft Intune a Custom profile can be used to apply a multi-app kiosk mode configuration via the AssignedAccess CSP. The following nine steps walk through applying the multi-app kiosk mode configuration with autologon by using the configuration node of the AssignedAccess CSP.
- Open the Microsoft Intune admin center navigate to Devices > Windows > Configuration profiles
- On the Windows | Configuration profiles blade, click Create > New policy to open the Create a profile page
- On the Create a profile blade, select Windows 10 and later > Templates > Custom and click Create
- On the Basics page, provide a unique name to distinguish the profile from other custom profiles and click Next
- On the Configuration settings page, as shown below in Figure 1, click Add to add rows for the following custom settings and click Next
- OMA-URI setting – This setting is used to configure multi-app kiosk mode with autologon on Windows 11
- Name: Provide a unique name for the OMA-URI setting to distinguish it from other similar settings
- Description: (Optional) Provide a description for the OMA-URI setting to further differentiate settings
- OMA-URI: Specify ./Vendor/MSFT/AssignedAccess/Configuration as value to configure multi-app kiosk mode
- Data type: Select String as value
- Value: Specify the created XML-file as value to set the required multi-app kiosk mode configuration
- On the Scope tags page, configure the applicable scopes and click Next
- On the Assignments page, configure the assignment and click Next
- On the Applicability rules page, configure the applicability rules and click Next
- On the Review + create page, verify the configuration and click Create
Note: At some point in time this setting might become directly available within Microsoft Intune.
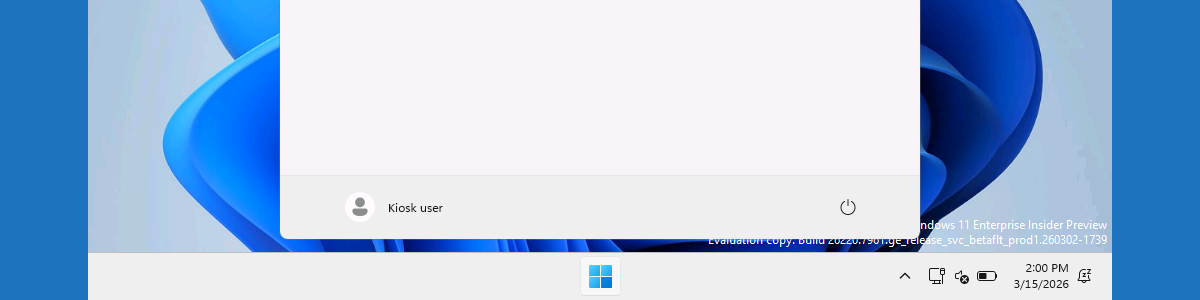
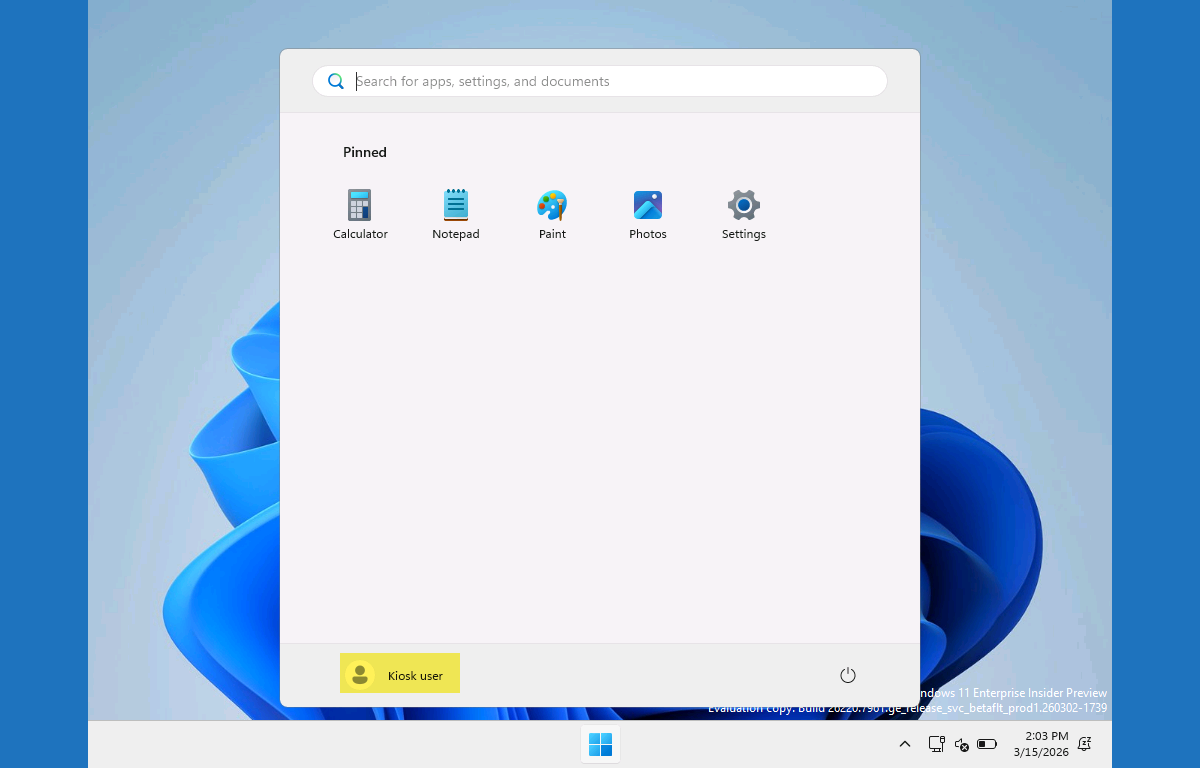
Experiencing the profile assignment
When the multi-app kiosk mode configuration is applied, it is pretty straightforward to experience the behavior. The provided example should create a multi-app kiosk mode with an autologon of Kiosk user. That is the display name of the automatically created autologon user for the multi-app kiosk configuration. The rest of the look-and-feel is similar to what was previously created in the earlier post about configuring multi-app kiosk mode on Windows 11.
More information
For more information about multi-kiosk mode on Windows 11 devices, refer to the following docs.
- Create an Assigned Access configuration file | Microsoft Learn
- Configure a Multi-App Kiosk With Assigned Access | Microsoft Learn
- AssignedAccess CSP | Microsoft Learn
Discover more from All about Microsoft Intune
Subscribe to get the latest posts sent to your email.
What would you do for public devices where you wanted to be sure that no data was left behind by the previous user? No logins, no files etc. keeping in mind that users could just walk away at any time and not be relied on to click any sort of “reset” button?
What data are those user having access to?
Regards, Peter