
This week is all about the new Windows Backup for Organizations feature that has become available. The Windows Backup for Organizations feature is initially aimed at making it easier to transition from Windows 10 to Windows 11. Besides that, it also makes it easier to switch towards new Windows 11 devices and versions. At this point in time Windows Backup for Organizations can be used to preserve user settings and Microsoft Store app configurations. Especially the first part seems to have a lot of similarities with the already existing Enterprise State Roaming functionality. One might consider Windows Backup for Organizations as the on steroids version of Enterprise State Roaming. Where Enterprise State Roaming is really focused on the basics of the user experience, Windows Backup for Organizations adds many settings in the different categories in the Settings app. From Bluetooth settings to Personalization settings, and from Accessibility settings to File Explorer settings. That makes that the combination, of Enterprise State Roaming and Windows Backup for Organizations, will bring the user towards a similar Windows experience when moving towards a new device, when talking about settings. On top of that, only the list of installed Store apps is part of the backup. This post will provide information about Windows Backup for Organizations and the configurations.
Note: For a complete list of settings that will be part of Windows Backup for Organizations, see the documentation.
Requirements for Windows Backup for Organizations
When looking at using Windows Backup for Organizations, it’s important to be familiar with the requirements. Mainly because it’s important to be using the specific minimal versions of Windows 10 and Windows 11. When looking at the backup requirements the device must be running Windows 10, version 22H2 or Windows 11, version 22H2, version version 23H2, or version 24H2, with in all cases at least the security update of August 2025. Besides that, the device must be Entra joined or Entra hybrid joined.
When looking at the restore requirements the device must be running Windows 11, version 22H2, version version 23H2, or version 24H2, with at least the security update of July 2025. On top of that, the user must have at least one backup available, and the device must be Entra joined. Besides that, when using Windows Autopilot, it must be using the user-driven mode. The latter makes a lot of sense as the user must eventually select the backup that should be restored.
Enabling the Windows Backup functionality
When the requirements are applicable to the environment, the actual configuration starts with enabling the Windows Backup functionality. Luckily, that configuration is already available as a setting within the Settings Catalog. That setting is EnableWindowsBackup, with the friendly name of Enable Windows Backup, and is part of the SettingSync.admx. In other words, it’s an ADMX-backed setting. That same ADMX-file also contains more detailed settings related to the categories of settings that should be part of the backup. For a complete overview of those settings see the documentation. Eventually, the configuration is pretty straightforward, as all settings are available within the same category within the Settings Catalog. The following eight steps walk through the process of simply enabling the Windows Backup functionality.
- Open the Microsoft Intune admin center portal and navigate to Devices > Windows > Configuration profiles
- On the Windows | Configuration profiles blade, click Create > New Policy
- On the Create a profile blade, select Windows 10 and later > Settings catalog and click Create
- On the Basics page, provide at least a unique name to distinguish it from similar profiles and click Next
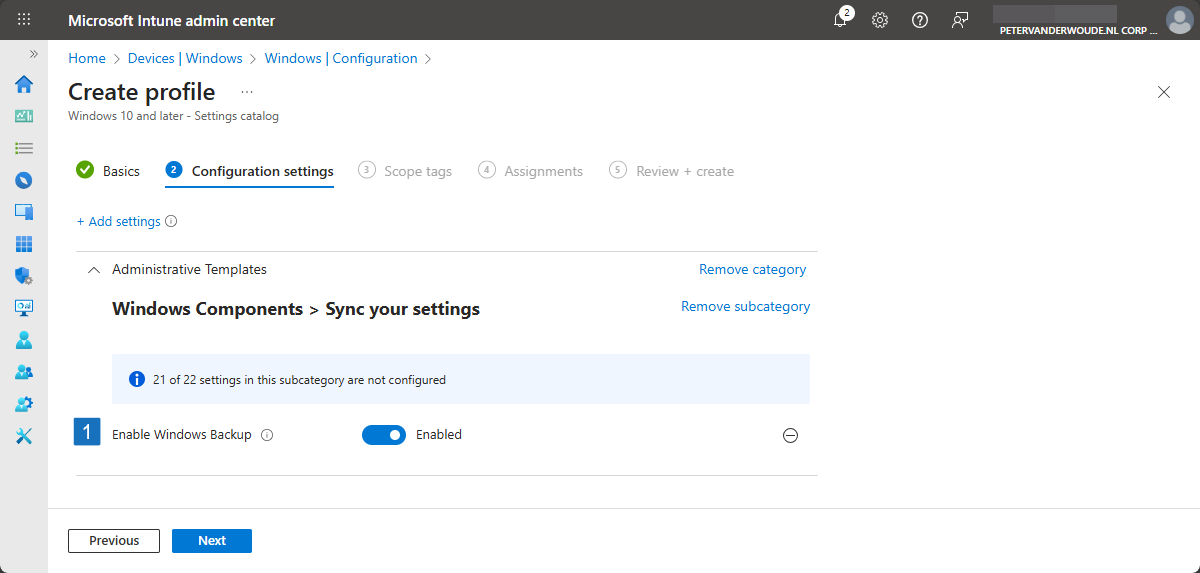
- On the Configuration settings page, as shown below in Figure 1, perform the following actions and click Next
- Click Add settings, navigate to Administrative Templates > Windows Components > Sync your settings and select Enable Windows Backup in Settings picker
- Switch the slider with Enable Windows Backup to Enabled to enable the Windows Backup functionality
- On the Scope tags page, configure the required scope tags and click Next
- On the Assignments page, configure the assignment for the required user or devices and click Next
- On the Review + create page, verify the configuration and click Create
Enabling the Windows Restore functionality
When backups are being created, the next part of the configuration is enabling the Windows Restore functionality. That functionality is actually provided through the out-of-box-experience. Enabling that experience can only be done on a tenant-level and is part of the Enrollment options within Microsoft Intune. The following three steps walk through that process.
- Open the Microsoft Intune admin center portal and navigate to Devices > Windows > Enrollment
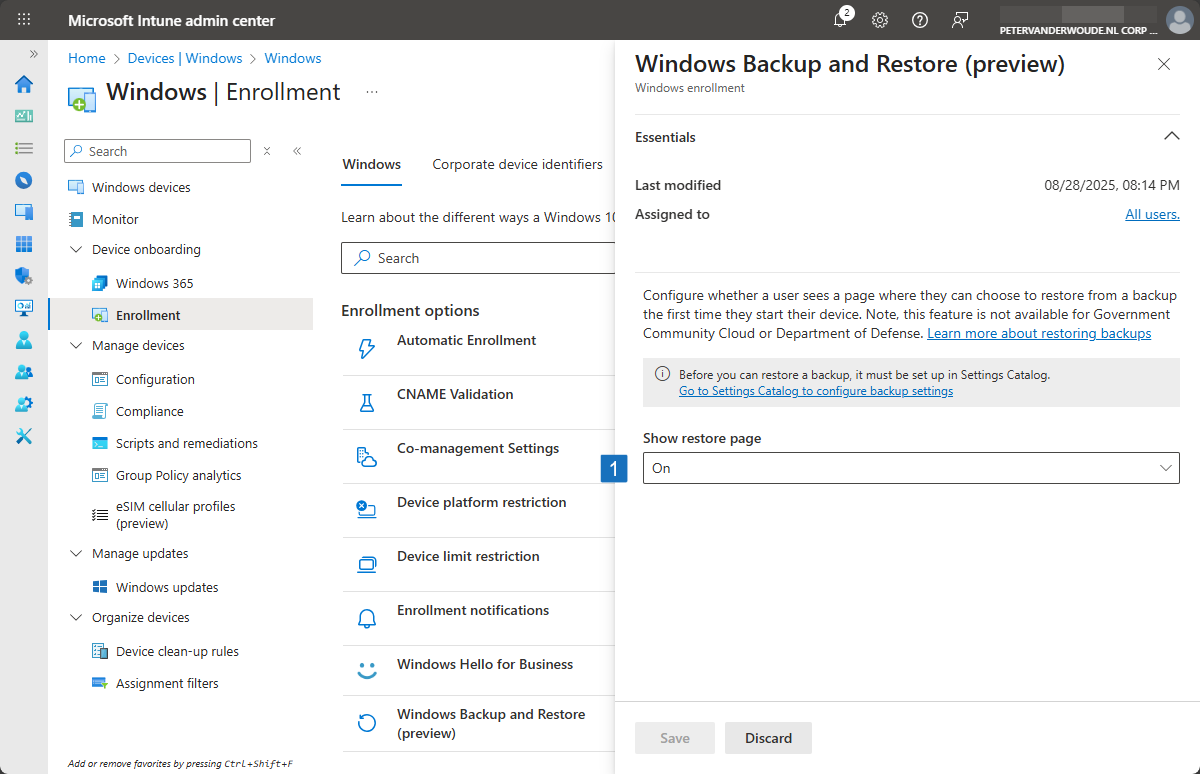
- On the Windows | Enrollment blade, click Windows Backup and Restore
- On the Windows Backup and Restore blade, as shown below in Figure 2, select On with Show restore page to enable the Windows Restore functionality and click Save
Experiencing the Windows Backup and Restore functionality
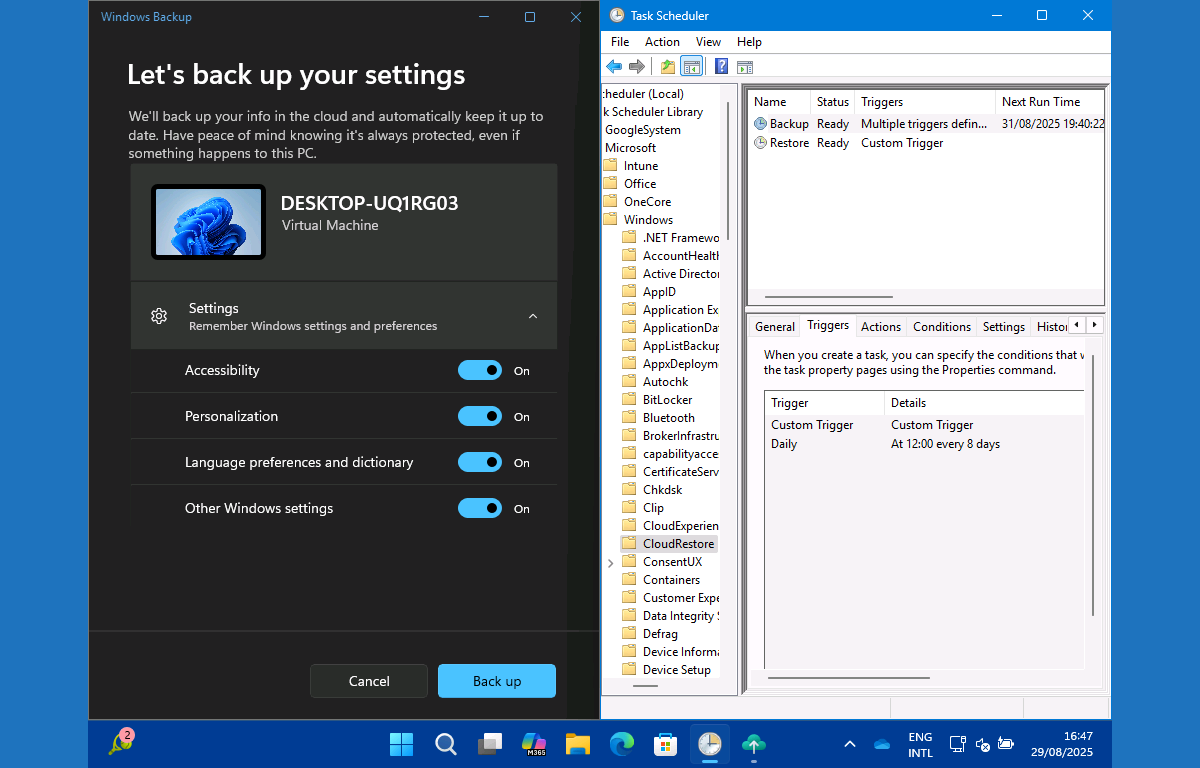
When the configuration is in place, it’s actually pretty straightforward to experience the new behavior. After enabling the Windows Backup functionality, new scheduled tasks will be created (as shown below in Figure 3). The backup task will actually create the backups and runs once every 8 days, or when manually triggered. On the other hand, the Windows Backup app (as shown below in Figure 3) will provide the user with access to their backup settings. And to the ability to start a new backup. That action will actually use the same scheduled task to create that backup.
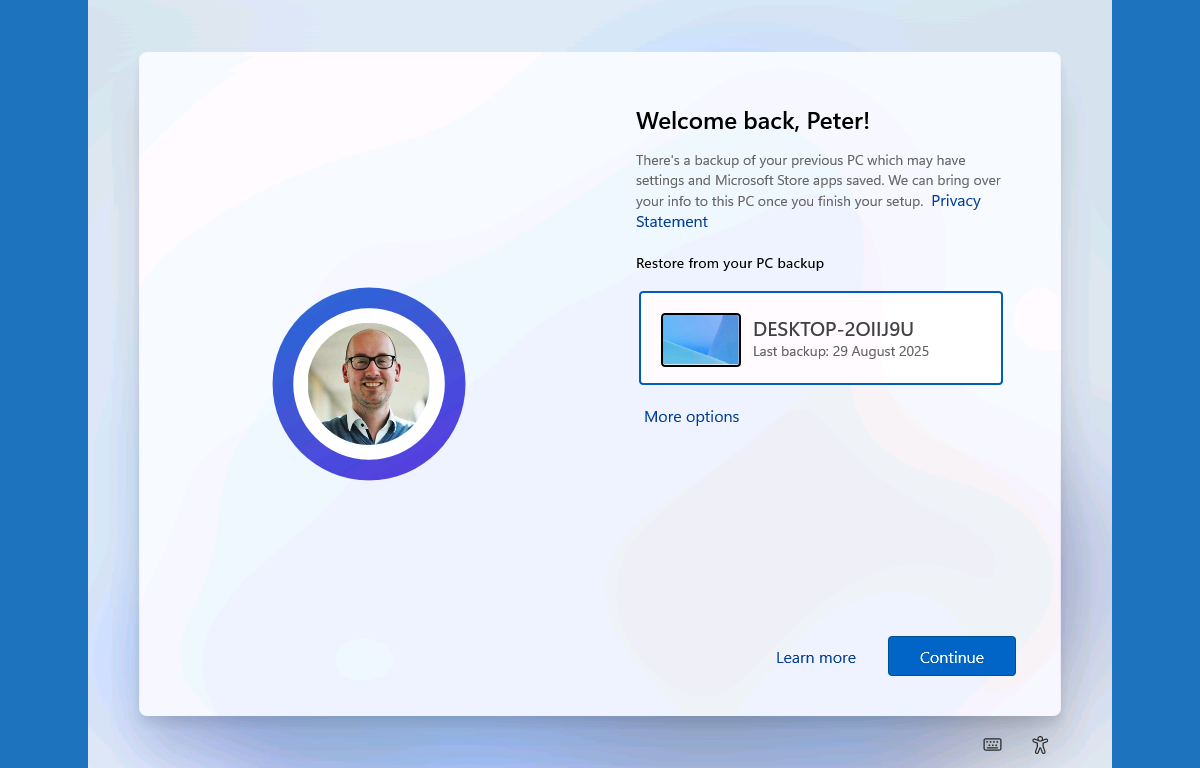
Once the backup is created, and the Windows Restore functionality is enabled, it’s even more straightforward to experience that behavior. During the out-of-box-experience, the user signs in with their user account that was used to create the backup. After signing in, the restore page shows (as shown below in Figure 4). On that page the user can select the backup that should be restored. By default, the most recent will be shown and by clicking on More options it will show older backups.
More information
For more information about about the Windows Backup and Restore functionality, refer to the following docs.
- Windows Backup for Organizations Overview | Microsoft Learn
- List of the Policy Settings To Configure Windows Backup for Organizations | Microsoft Learn
- Windows Backup for Organizations settings catalog | Microsoft Learn
- Windows Backup for Organizations is now available – Windows IT Pro Blog
Discover more from All about Microsoft Intune
Subscribe to get the latest posts sent to your email.
Hello Peter, these settings seem to have moved under the settings catalog I can only find the option to enable Windows Restore.
Would that settings enable both the backup and restore functionality?
Thanks!
You can ignore my previous question. Found the answer here: https://www.prajwaldesai.com/enable-windows-backup-and-restore-using-intune/
Thank you for sharing. But just to be sure that is also mentioned in this post.
Regards, Peter
Hello Peter,
Do you know where the backup are stored and if Microsoft makes us pay for it ? We talk something like more 1000 devices to backup
Hi Toriel,
If I’m not mistaken it is stored in Entra and is part of your existing licenses.
Regards, Peter
Hello Peter,
Is there an easy way for admins to confirm backups are functioning plus the total number of recovery points w/ execution date?
Thanks!
Hi P,
To my knowledge, not at this moment. For a lot more information about the storage have a look at the FAQ: https://learn.microsoft.com/en-us/windows/configuration/windows-backup/faq
Regards, Peter
Thanks for replying so quickly!