

This week is all about deployments and deployment plans. Deployments and deployment plans have been introduced recently to provide IT administrators with the ability to create an automated staged rollout. An experience that is actually pretty similar to using deployment rings for deploying software updates. Deployments enable IT administrators to create a staged rollout for applications and policies. That staged rollout contains deployment rings (group assignments) that automatically progress based on specific date and time criteria. Those deployment rings create that similar automated deployment experience as already provided by the software updates rings. Just like that experience, the IT administrators also gets the controls to pause, resume, cancel, and delete the deployment. On top of that, deployment plans provide the IT administrators with the ability to create a template configuration for the new deployments that defines the staged rollout. Together deployments and deployment plans provide the IT administrators with a lot more automation around the deployment of applications and policies. An automated process that will automatically proceed and only stops when needed and specifically indicated. This post will provide a brief look at those deployments and deployment plans.
Note: At the moment of writing the deployments and deployment plans are still in public preview.
Creating the deployment plan
Technically speaking, the deployment plan is not required before using deployments. It does, however, provide the IT administrators with the ability to create a reusable configuration for the deployments. That can simplify deployments on the long run. Deployment plans contain the configurations for the platform, the deployment rings, the assigned groups, and the deferral between rings. The creation and configuration of deployment plans is actually pretty straightforward. The following six steps walk through the creation of a deployment plan for the Windows platform, with three deployment rings, and a standardized delayed start per ring.
- Open the Microsoft Intune admin center portal and navigate Devices > Deployments
- On the Devices | Deployments page, navigate to Deployment plans and click Create Plan
- On the Basics page, specify at least a unique name that differentiates it from similar deployment plans and click Next
- On the Deployment schedule page, as shown below in Figure 1, perform the following actions and click Next
- With Platform select Windows 10 and later as the platform for this deployment plan
- Use Add rings to add the number of rings that are required for this deployment plan and specify the wait time
- Specify the required groups and filters per added deployment ring

- On the Scope tags page, configure the required scope tags and click Next
- On the Review + Create page, verify the configuration and click Save
Important: A ring that contains the All users or All devices group is automatically treated as the final ring.
Creating the deployment with the deployment plan
Deployments are used to actually deliver applications or policies to devices, using a staged rollout. The deployment contains the actual configuration of the deployment rings, delayed start per ring, group assignments, and more. Those basics of the deployment can be either configured manually or by using a deployment plan. Those basics will be combined with the actual policy or application that will be deployed. In the end, the deployment executes the actual staged rollout of the application or policy. The creation of a deployment is also pretty straightforward. The following six steps walk through the creation of a deployment for a Win32 app and applies the created deployment plan for a direct and easy configuration of the deployment rings.
- Open the Microsoft Intune admin center portal and navigate Devices > Deployments
- On the Devices | Deployments page, navigate to Deployments and click Create
- On the Basics page, specify at least a unique name that differentiates it from similar deployments and click Next
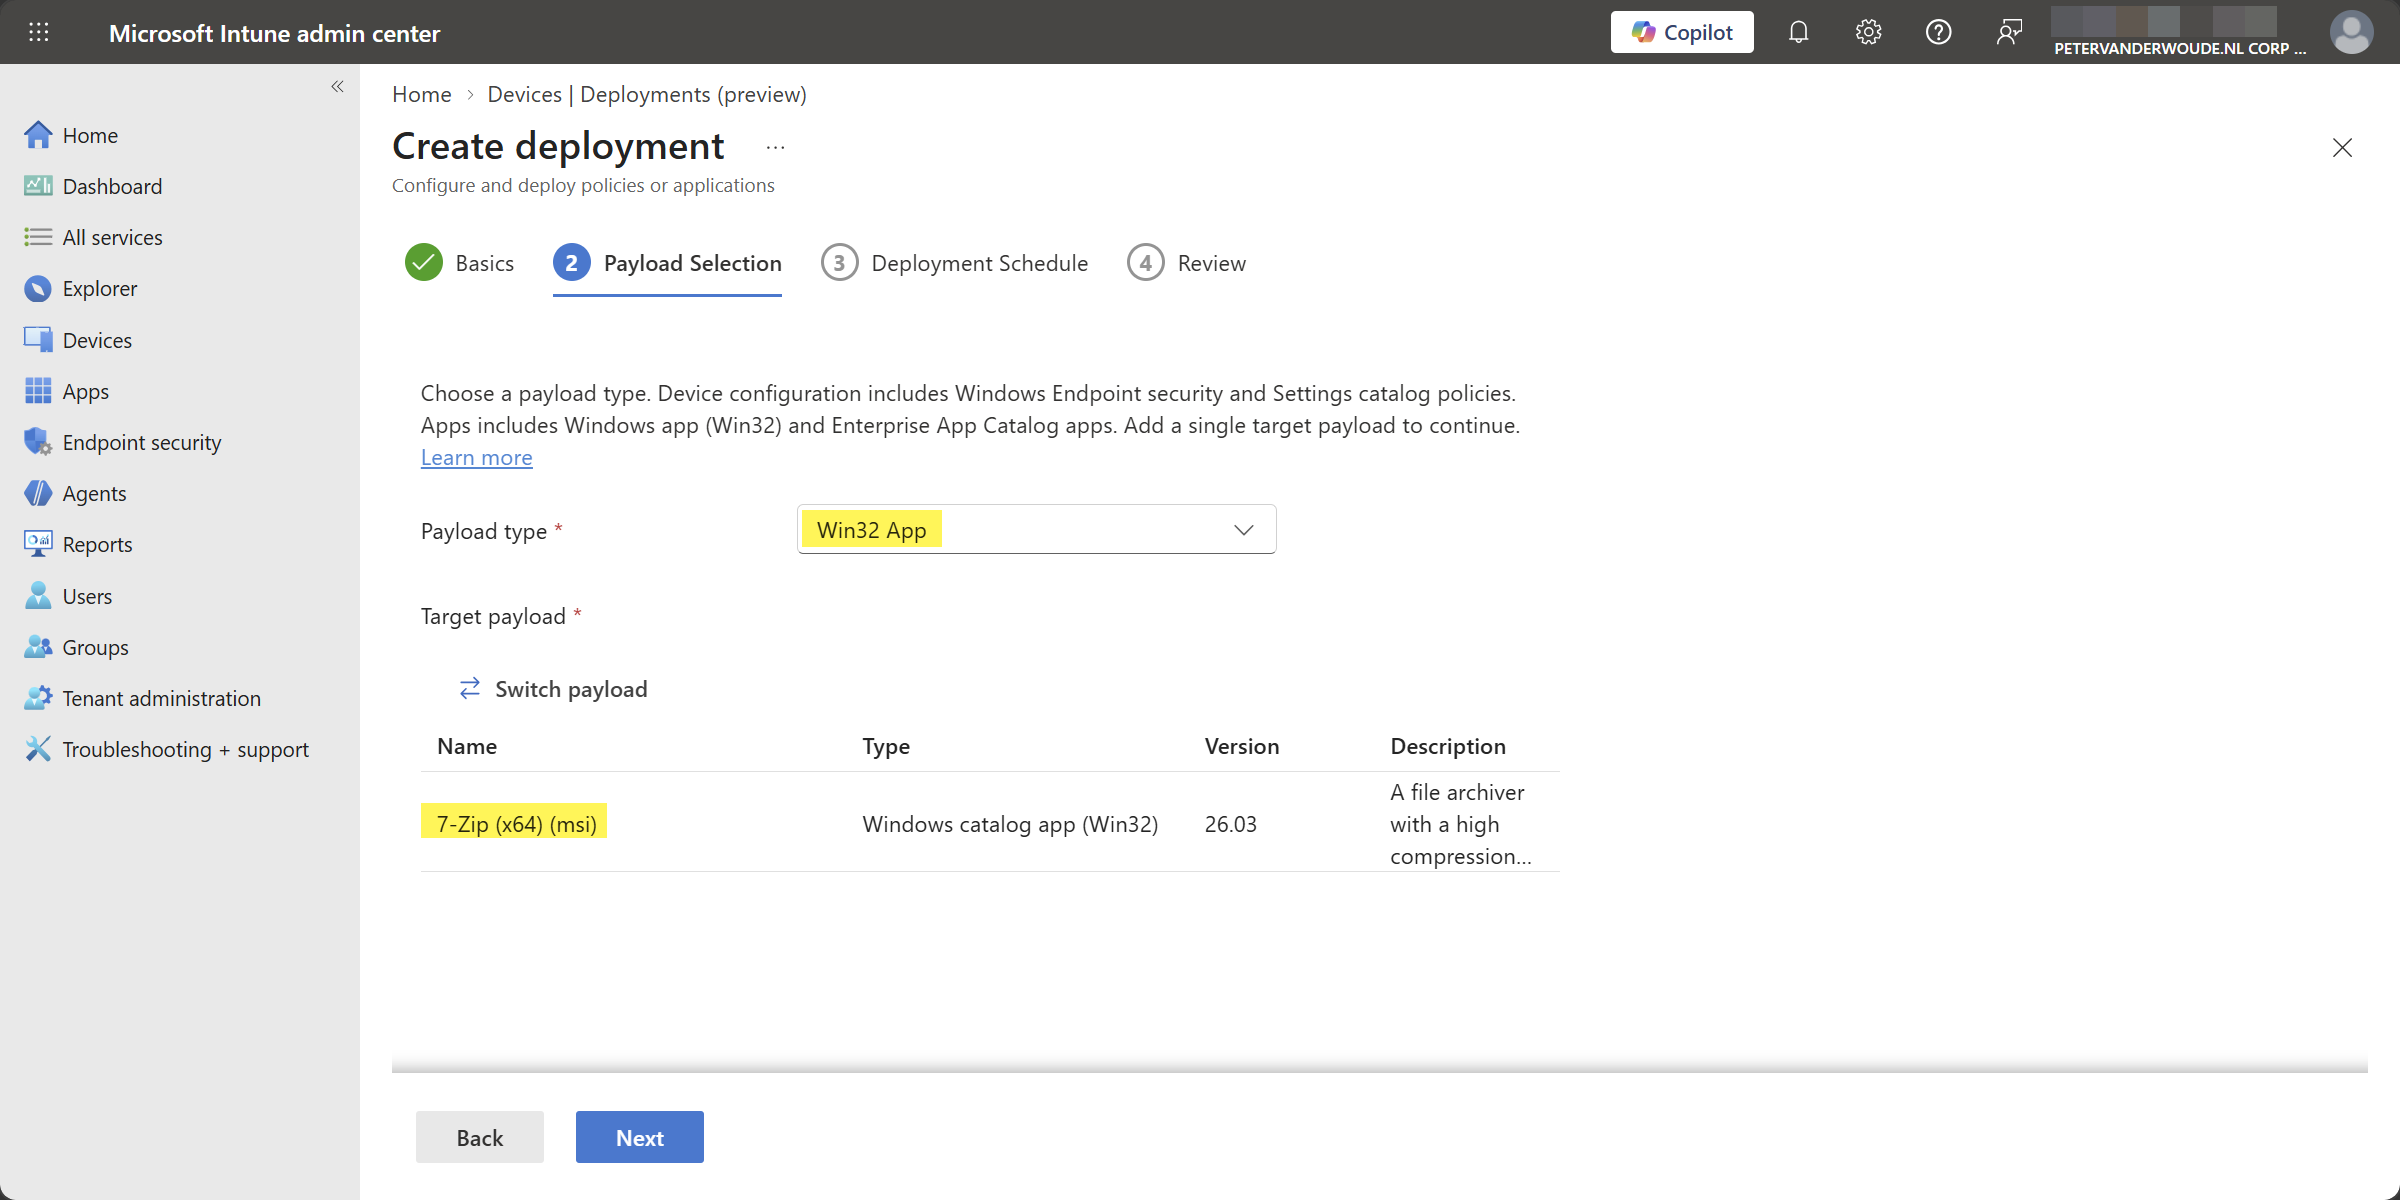
- On the Payload Selection page, as shown below in Figure 2, perform the following actions and click Next
- Payload type: Select Win32 App to create an automated deployment for an application
- Use Add payload to select the required Win32 app for the automated deployment
- On the Deployment Schedule page, as shown below in Figure 3, perform the following actions and click Next
- Select Load deployment plan to use the created deployment plan as the starting point
- Specify the Start date and Start time to schedule the start of the deployment
- Select the earlier created deployment plan to easily apply the standardized deployment rings
- Confirm the virtual group assignment, when the deployment plan contains an All users or All devices assignment
- Verify the deployment rings that are created based on the selected deployment plan
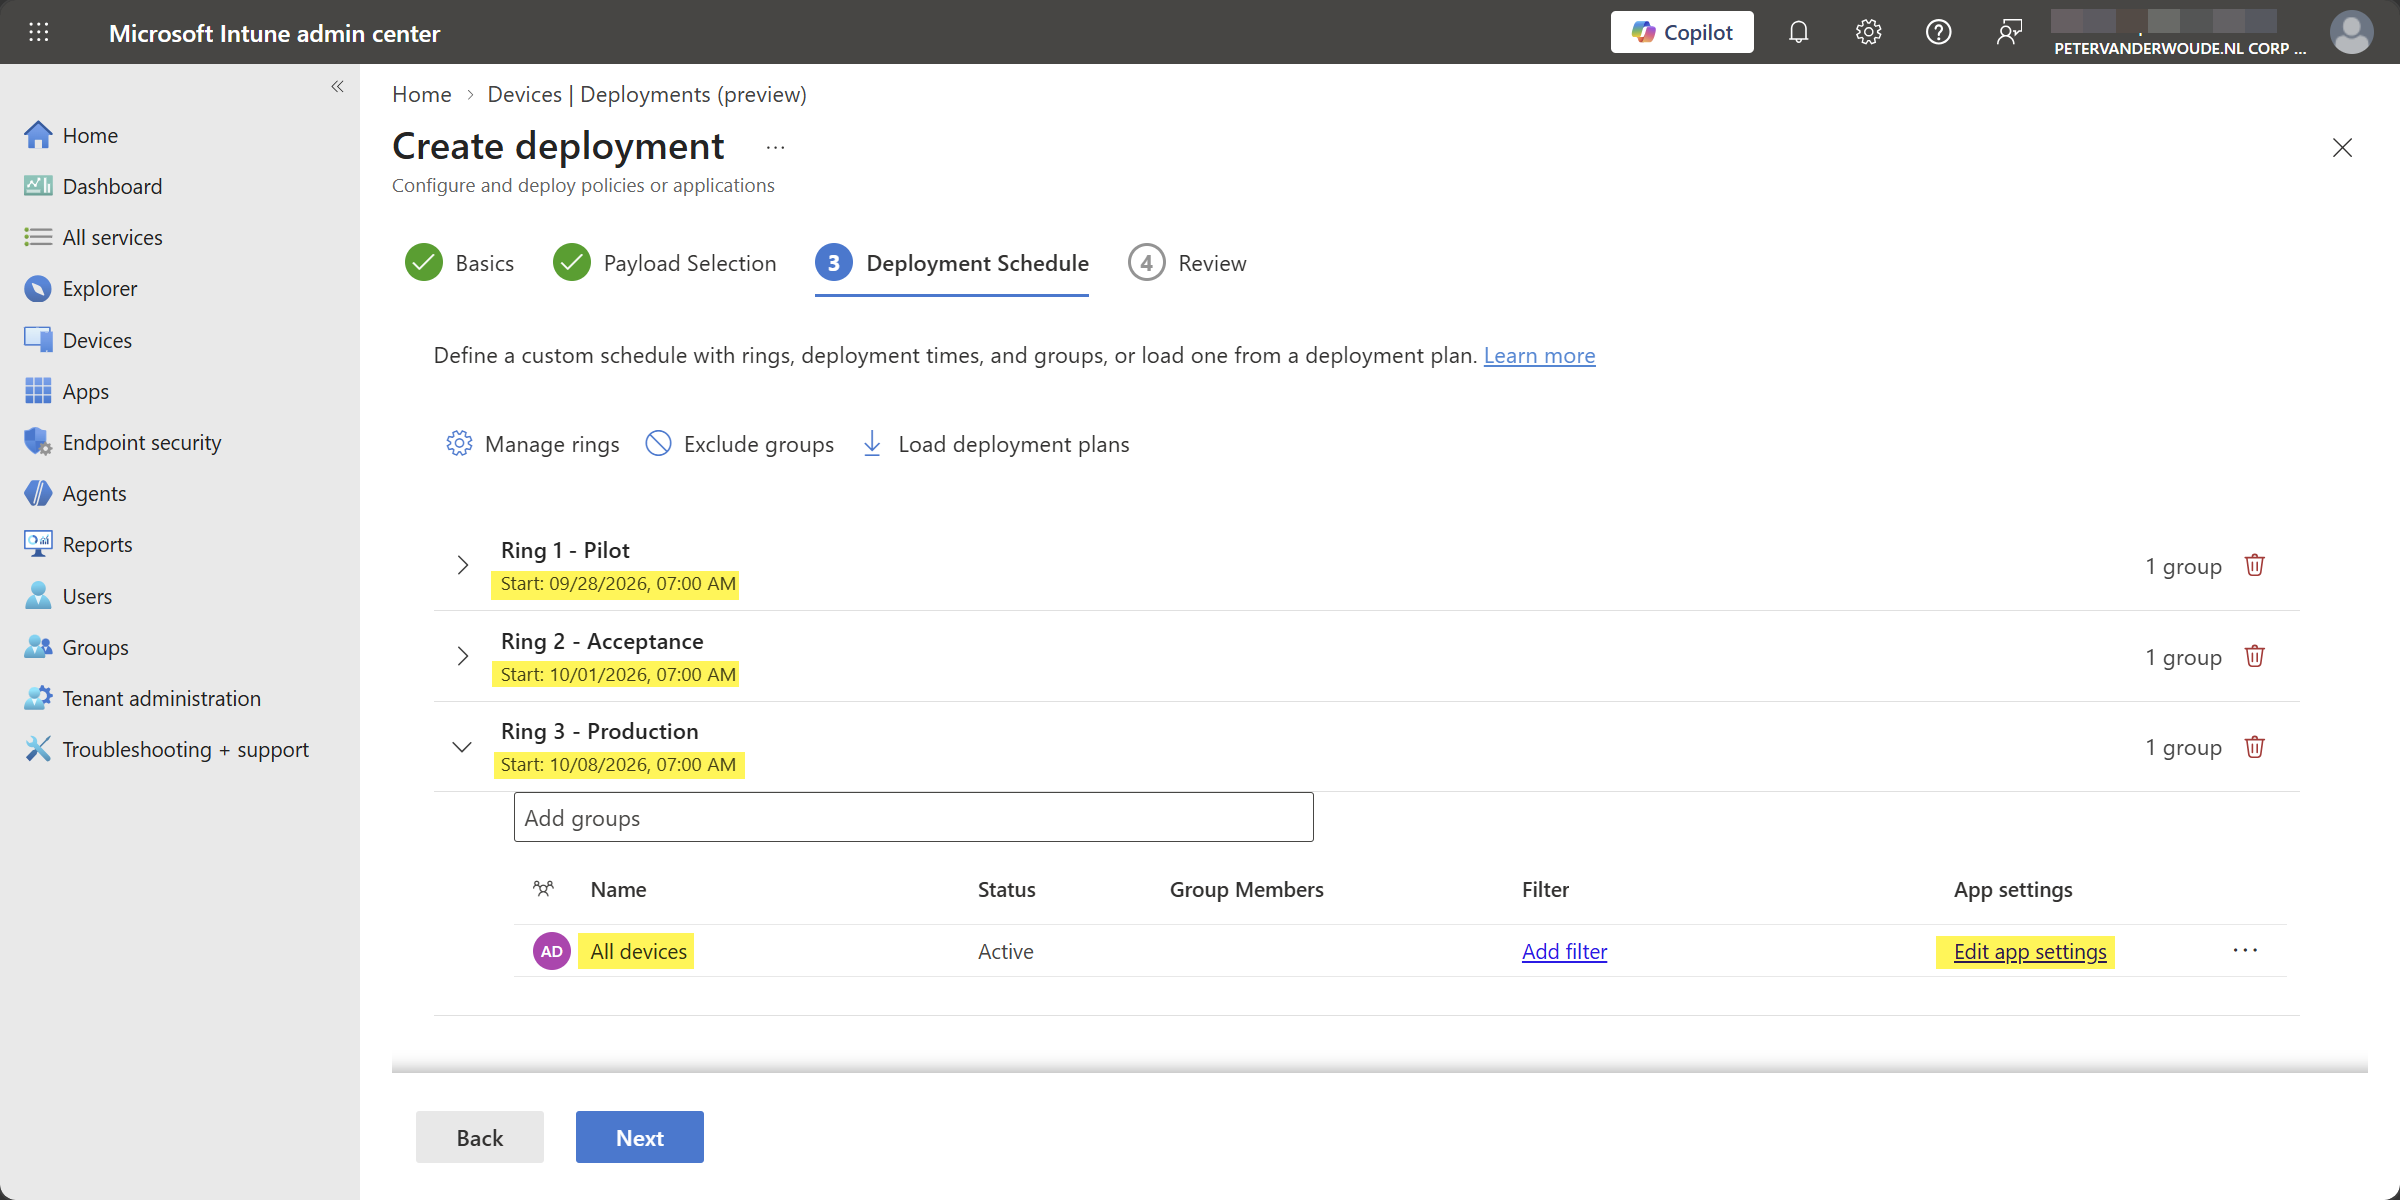
Note: This is also the point of the configuration that enables IT administrators to make som adjustments to the app settings.
- On the Review page, verify the configuration and click Save
Experiencing the deployment
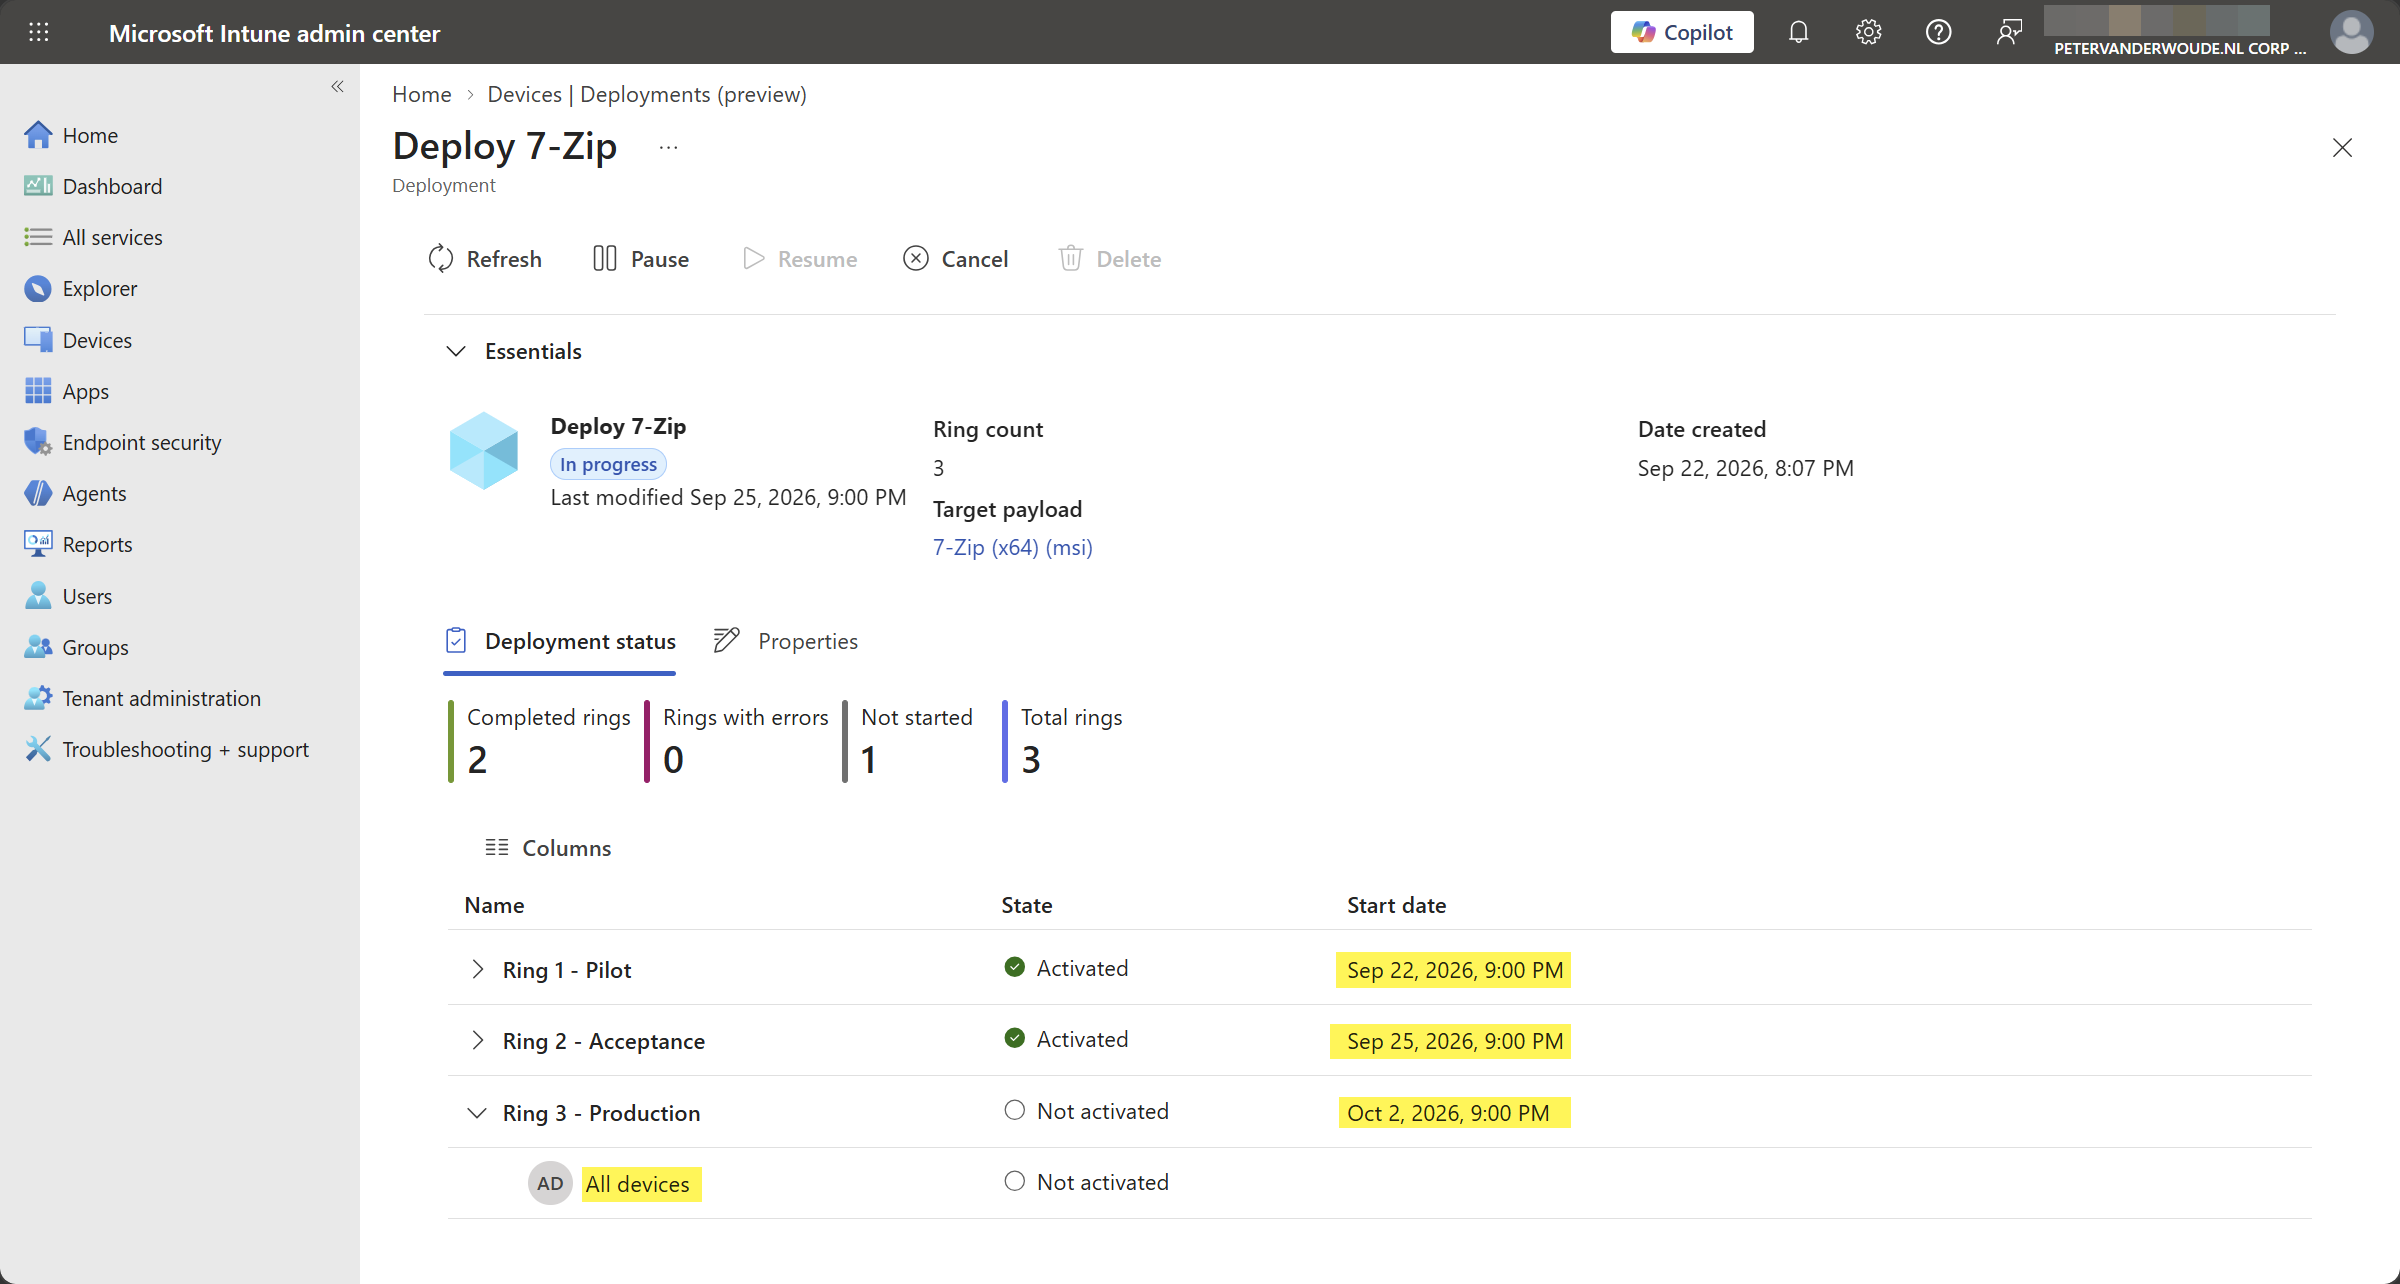
When the deployment is created it is also pretty straightforward to experience the behavior of that deployment. Not really on the user-side, as the user will not experience anything different. It is mainly a service-side change. The IT administrators on the other hand, can experience a difference in behavior. That difference is mainly focused on the automation that comes with the deployment. The deployment will automatically configure the required assignments for the selected application or configuration. That information can be verified from a deployment perspective and from a Win32 app perspective. The deployment will show the progress and provides the deployment management options, while the Win32 app shows the actual active assignment of the app. Below in Figure 4 is an overview of a running deployment for 7-Zip. That provides a nice overview of the state, the start date, and the group that should be used for the deployment ring.
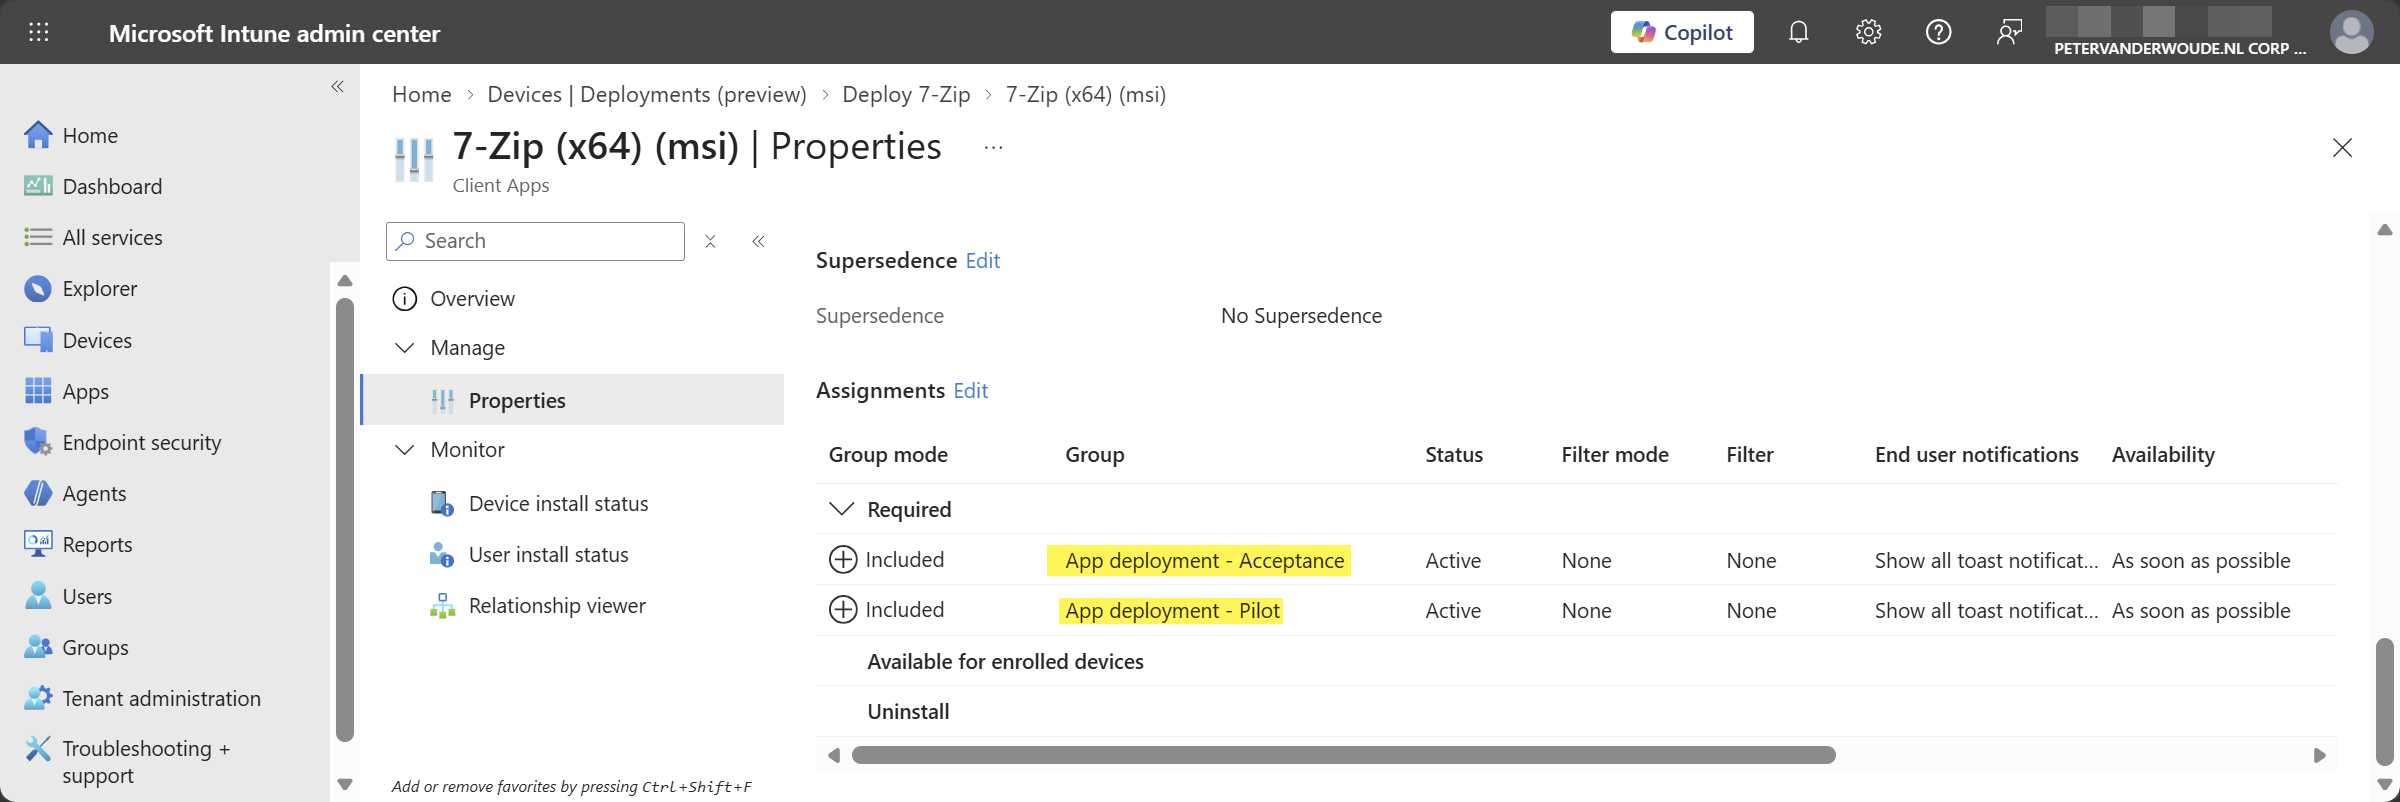
The assignments of the app that was part of the payload of the deployment, provides a clear overview of how the deployment handles the specified groups in the deployment ring. Below in Figure 5 is an overview of the assignments for 7-Zip, based on the status of the deployment. The second deployment ring is started and that shows with the assignments of the groups from the different deployment rings. When, in this example, the last deployment ring will start, the All devices assignment will eventually be the only assignment for this specific app deployment. That is the automatic behavior when using the virtual group assignment.
More information
For more information about deployments and deployment plans, refer to the following docs.
Discover more from All about Microsoft Intune
Subscribe to get the latest posts sent to your email.