
This week is all about a relatively new recovery functionality in Windows. And that functionality is Quick Machine Recovery, which is also known as Cloud Remediation. Quick Machine Recovery is focused on the recovery of Windows devices when encountering critical errors that prevent the device from booting. A huge strength of Quick Machine Recovery is that it can automatically search for remediations online and use that to recover from widespread boot failures. In practice that means that Quick Machine Recovery helps with addressing the most severe failures within the environment. The type of system failures that gets devices stuck in the Windows Recovery Environment (WinRE). The type of system failures that require significant troubleshooting time. And that’s especially challenging when it’s a widespread outage. Quick Machine Recovery enables Windows to send diagnostic data to Microsoft to identify the issue and, when it’s a known issue, to automatically download and install the fix. All with the focus on helping with reducing the workload on the IT administrators and getting users quickly into a productive state. This post will focus on that new functionality and its configuration. This post will end with the user experience.
Important: Quick Machine Recovery is available In the Beta Channel for Windows Insiders on Windows 11 version 24H2.
Enabling quick machine recovery
When looking at the configuration of Quick Machine Recovery, it all starts with the available configuration options. And there are actually multiple options for configuring Quick Machine Recovery. The configuration can be done manually by the user via the Settings app and navigating to System > Recovery > Quick machine recovery and the configuration can also be done automatically. The first option for that is the reagentc.exe and that tool can be used to configure Windows RE – including Quick Machine Recovery – via the command line. The other option that is available is using the RemoteRemediation CSP (./Vendor/MSFT/RemoteRemediation/CloudRemediationSettings). That CSP contains all the settings related to Cloud Remediation and is available directly in Windows 11 (currently in preview).
All the different options enable IT administrators to enable and configure Quick Machine Recovery. The latter option, via the CSP, can be easily configured by using Microsoft Intune, as the different settings are already available within the Settings Catalog. The following 8 steps can be used for enabling and configuring quick machine recovery, by using the Settings Catalog.
- Open the Microsoft Intune admin center portal and navigate to Devices > Windows > Configuration profiles
- On the Windows | Configuration profiles blade, click Create > New Policy
- On the Create a profile blade, select Windows 10 and later > Settings catalog and click Create
- On the Basics page, provide at least a unique name to distinguish it from similar profiles and click Next
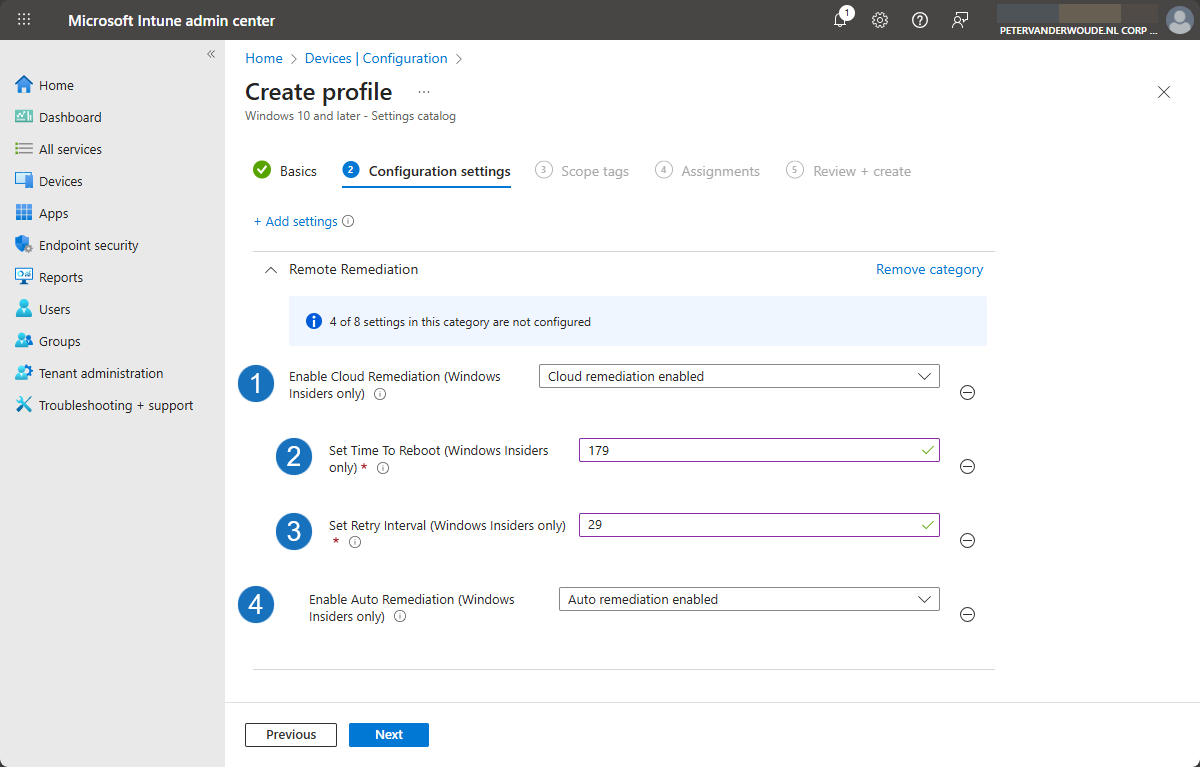
- On the Configuration settings page, as shown below in Figure 1, perform the following actions and click Next
- Click Add settings, navigate to Remote Remediation and select Enable Cloud Remediation in Settings picker
- Select Cloud remediation Enabled with Enable Cloud Remediation (1) to enable the usage of cloud remediation
- Use Network Password, Network Password Encryption Store, Network Password Encryption Type, and Network SSID to specify the WiFi configuration that can be used during the cloud remediation process
- Specify the time with Set Time To Reboot (2) to determine the time to reboot during auto remediation
- Specify the retry interval with Set Retry Interval (3) to determine the retry interval during auto remediation
- Select Auto Remediation Enabled with Enable Auto Remediation (4) to enable auto remediation
- On the Scope tags page, configure the required scope tags and click Next
- On the Assignments page, configure the assignment for the required user or devices and click Next
- On the Review + create page, verify the configuration and click Create
Important: At the moment of writing the settings in the Settings Catalog might still show as not applicable. In that case, the custom device configuration can still be used for configuring the required settings.
Experiencing Quick Machine Recovery
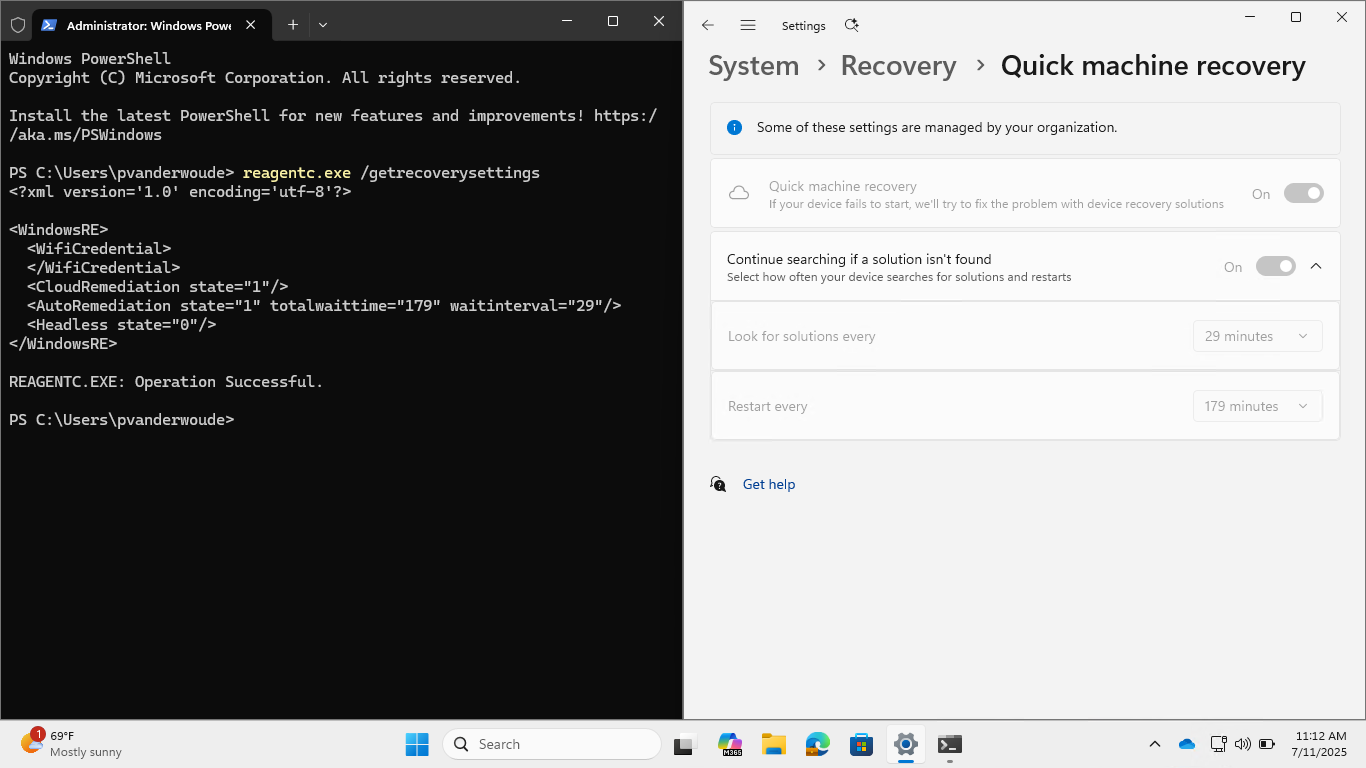
After the configuration of Quick Machine Recovery, it’s time to actually experience Quick Machine Recovery. And there are actually multiple places to look to verify the successful configuration. The first and most obvious location to look at is in the Settings app, as shown below in Figure 2 on the right. That will clearly show the applied configuration related to Quick Machine Recovery. Besides that, the configuration can also be verified by using reagentc.exe, as shown below in Figure 2 on the left. Both methods will show the same applied configuration of Quick Machine Recovery.
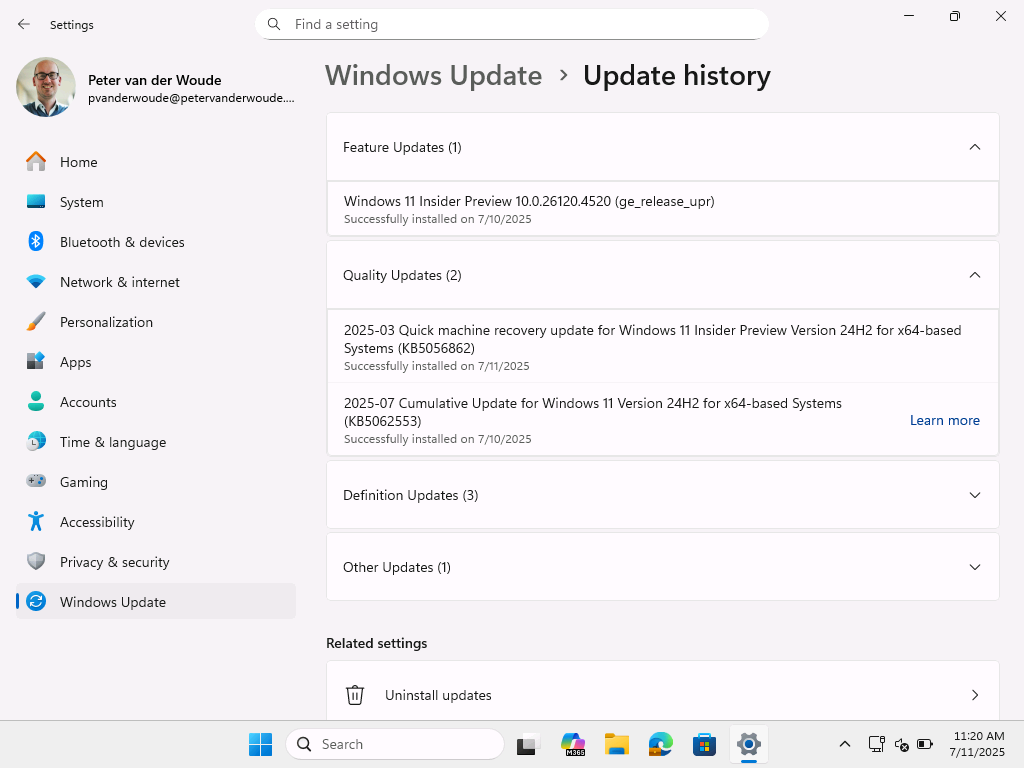
Once the configuration is verified, the next thing is to actually really experience the behavior with Quick Machine Recovery. For initial testing, there is a test mode available for Quick Machine Recovery. The test mode can be started by first enabling test mode using the command line reagentc.exe /SetRecoveryTestmode, followed by configuring Windows to boot to WinRE on the next boot using the command line reagentc.exe /BootToRe. Now simply restart the device to experience the behavior. That behavior is shown below in Figure 3 and the real experience will be similar. To verify the Quick Machine Recovery remediation, simply look at the Windows Update history. The remediation will be listed under Quality updates, as shown below in Figure 4.

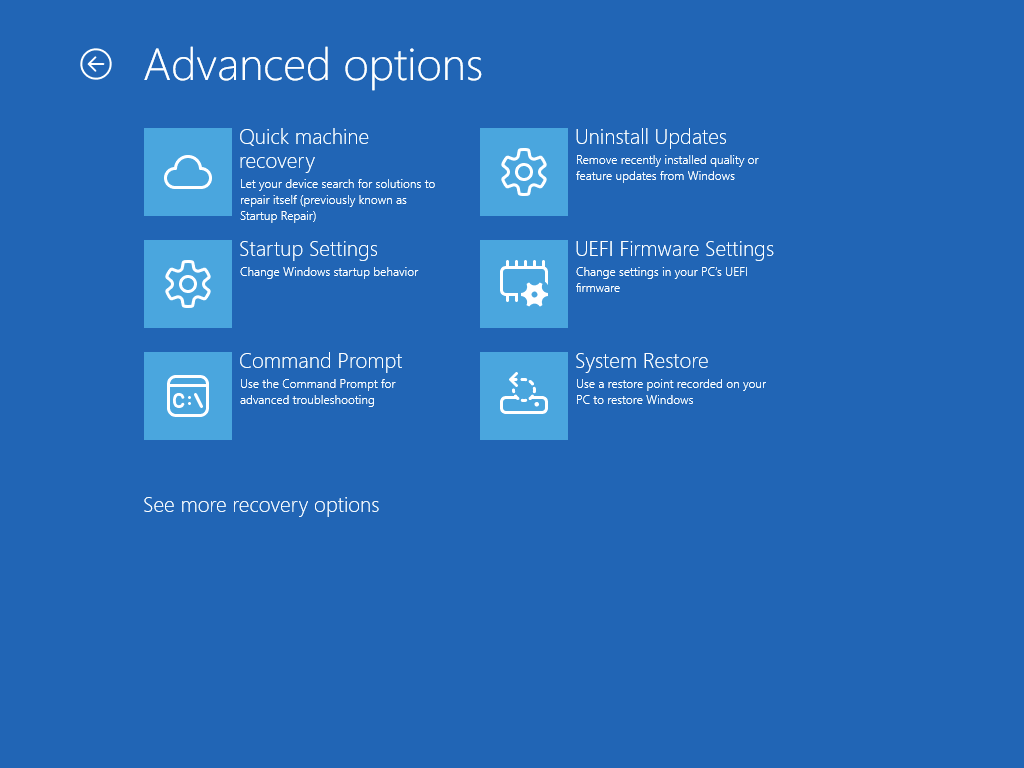
Besides that, Quick Machine Recovery can also be started via the Advanced options that is available between the troubleshooting options, as show above in Figure 5. After that, the experience will be similar to the test mode.
More information
For more information about quick machine recovery in Windows 11, refer to the following docs.
- Get started with quick machine recovery in Windows – Windows IT Pro Blog
- Quick Machine Recovery | Microsoft Learn
- RemoteRemediation CSP | Microsoft Learn
Discover more from All about Microsoft Intune
Subscribe to get the latest posts sent to your email.
Thanks Peter, hopefully all of this gets enabled by default when out of beta testing.
Hi Laurie,
It has actually just been released. From what I have read, I can say that it will be enabled by default on Home devices. Pro and Enterprise devices need to be enabled by IT.
Regards, Peter