This week is not about something new, this week is about configuring the visibility of the different Settings pages. The Settings app is the Windows application that provides a unified interface to manage the different system settings. Almost everything that was configurable in the old days via Control Panel, is now configurable via the Settings app. With some exceptions of course. The main reasons to make adjustments to the visibility of the different Settings pages, are to create a more controlled and secure environment. That can be especially useful for specific types of devices, such as kiosk devices and student devices. In those cases, limiting the access to different Settings pages can help with preventing unauthorized changes and maintaining a consistent user experience. The good thing is that there are pretty granular controls for configuring the accessible pages. This post will provide a closer look at the available pages and the configuration options. This post will end with the user experience.
Configuring visibility of Settings pages
When looking at configuring the visibility of the different Settings pages, it all starts with the available pages themselves. There are many pages available and all documented pretty well. That is documented here in the context of the ms-settings: URI scheme, to directly launch Settings to specific settings pages. Every page has its own URI. Simply find the required pages in the documentation and use that as the starting point for the configuration.
The actual configuration itself is simply specifying the required pages. Luckily, the required configuration for that is already available as a setting within the Settings Catalog. That setting is SettingsPageVisibility, with the friendly name of Page Visibility List, and is part of the ControlPanel.admx. In other words, it’s an ADMX-backed setting. The configuration of that setting can be achieved by using two different modes. A mode to only show the specified pages (showonly:), or to hide the specified pages (hide:). Eventually, the configuration is pretty straightforward, as all settings are available within the same category within the Settings Catalog. The following eight steps walk through the process of only showing the specified pages.
- Open the Microsoft Intune admin center portal and navigate to Devices > Windows > Configuration profiles
- On the Windows | Configuration profiles blade, click Create > New Policy
- On the Create a profile blade, select Windows 10 and later > Settings catalog and click Create
- On the Basics page, provide at least a unique name to distinguish it from similar profiles and click Next
- On the Configuration settings page, as shown below in Figure 1, perform the following actions and click Next
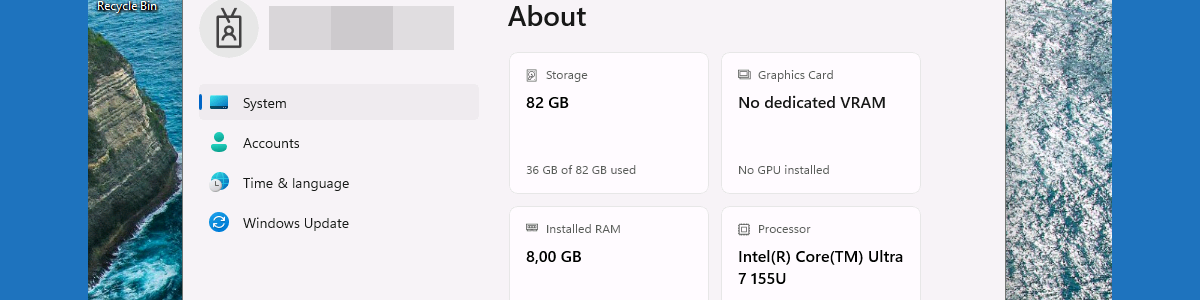
- Click Add settings, navigate to Settings and select Page Visibility List (User) in Settings picker
- Specify
showonly:workplace;about;dateandtime;network-wifi;windowsupdatewith Page Visibility List (User) to only enable the pages for System, Accounts, Time and Language, Wi-Fi, and Windows Update

- On the Scope tags page, configure the required scope tags and click Next
- On the Assignments page, configure the assignment for the required user or devices and click Next
- On the Review + create page, verify the configuration and click Create
Experiencing visibility of Settings pages
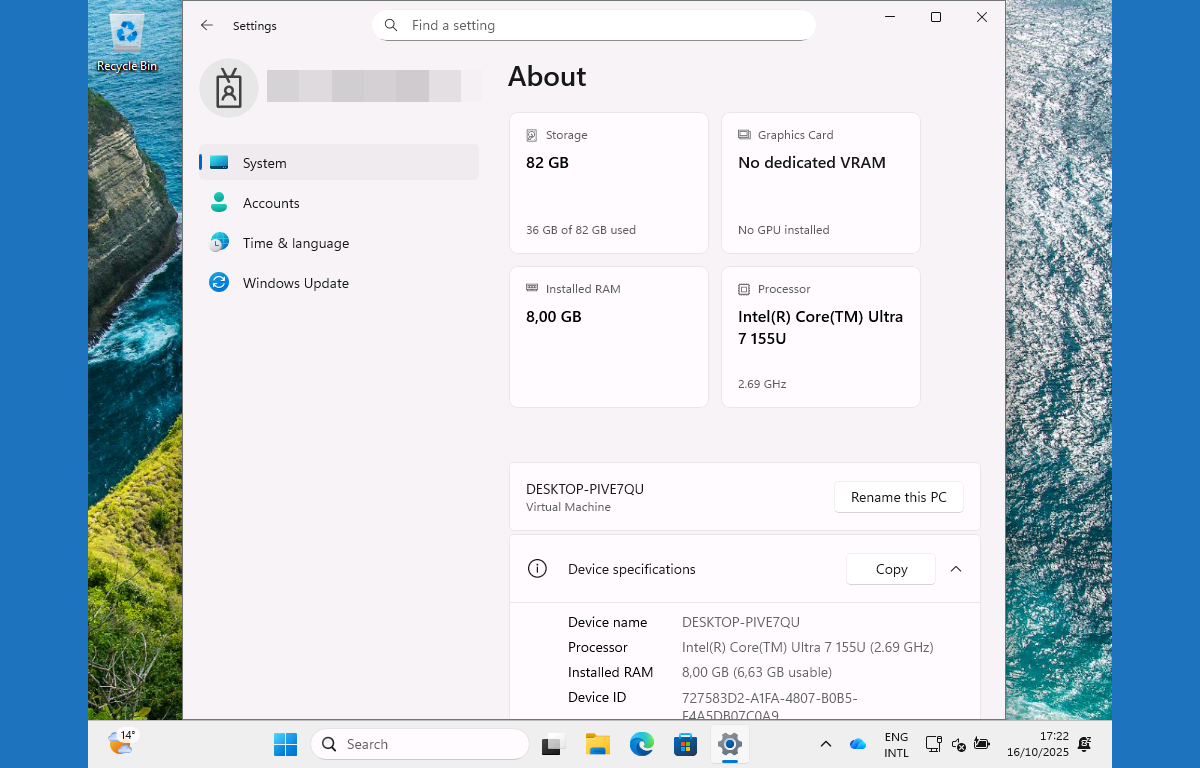
After applying the configuration for the visibility of specific Settings pages, it is pretty straightforward to experience that. Simply open the Settings app, as shown below in Figure 2, and experience the new behavior. With the example configuration, only the specified pages will be available within the Settings app.
More information
For more information regarding the visibility of Settings pages refer to the following docs.
- Configure the Settings Page Visibility in Windows | Microsoft Learn
- Launch Windows Settings – Windows apps | Microsoft Learn
Discover more from All about Microsoft Intune
Subscribe to get the latest posts sent to your email.
Hi Peter,
Have you come across an issue where, when setting up a multi-app kiosk, the “Accounts” section in Settings (which should allow you to sync an AADJ kiosk device if needed) doesn’t appear when signed in as the local kiosk account?
However, when you sign in as an AAD user or a local admin account, the option is visible.
Regards
Hi Jaruzelski,
That does not directly ring a bell. Can you provide some more details about what your configuration looks like?
Regards, Peter